Running Qt4 Examples on Embedded Linux using ARM emulator

In this article I will show how to run Qt4-Embedded Examples on Angstrom Linux using QEMU. The procedure doesn’t require any compilation or cross compilation. It uses Angstrom Linux precompiled packages, online image builder, and works both on Windows and Linux. Qt4 Embedded allows to run Qt applications directly in Linux Framebuffer, bypassing X Windows completely. This is especially important during embedded development, because it allows to save a lot of memory and start up time. Qt4 has a rich set of examples directly embedded into Qt sources. Below is a few samples of how it looks like:

I will show how to run them. First, you need to install QEMU. For Windows, the easiest way is to download zipped executables, which I shared here:

Qemu-windows-0151. For Linux it’s usually apt-get install qemu-system. Then, we need to build Angstrom image. For those unpatient, I shared a prebuilt image here: angstrom-qt4-embedded. Angstrom has online image builder available here: Angstrom Image Builder. You need to pick console image and download it. The small trick is that you need to download kernel image yourself (from here: kernel-image-2.6.37.2_2.6.37-r4.6_qemuarm.ipk) and unpack it using ar -x kernel-image.ipk command. This is because online image builder doesn’t include kernel image for some reason. However this step is not required if you download the image I shared. Next, you need to start QEMU using kernel image and prebuilt angstrom image. The command looks like this: qemu-system-arm -M versatilepb -usb -usbdevice wacom-tablet -show-cursor -m 64 -kernel zImage-2.6.37.2 -hda disk.img -append “root=/dev/sda2 rw” For convenience, I prepared run script, which does that. Next, you need to login as root and install qt4-embedded using command: opkg install qt4-embedded. This can be again skipped if you use the image I prepared. In order to run demos, you need to use this command: qtdemoE -qws It looks like this:

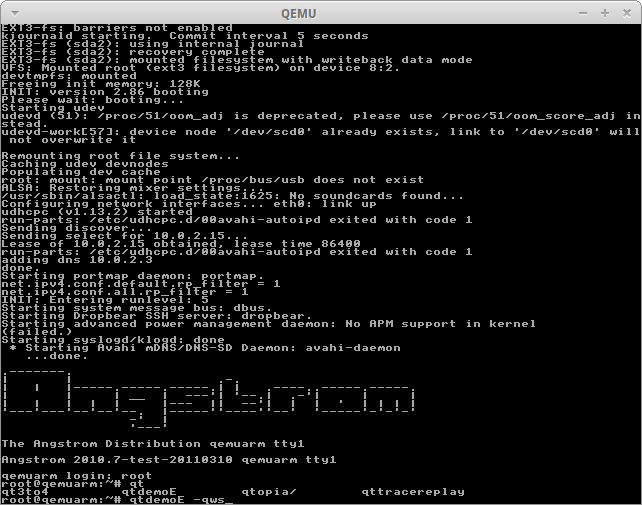
You can run the other examples from Qt, in standalone mode from

/usr/bin/qtopia directory. You need to use similar command app -qws. The command is required to initialize Qt framebuffer. It is possible to run a few executables on the same display. In order to do this, you need to run the first one only with qws parameter. The other apps will connect to it. Have fun!

You May Also Like

Spock, Java and Maven

Few months ago I've came across Groovy - powerful language for JVM platform which combines the power of Java with abilities typical for scripting languages (dynamic typing, metaprogramming).

Together with Groovy I've discovered spock framework (https://code.google.com/p/spock/) - specification framework for Groovy (of course you can test Java classes too!). But spock is not only test/specification framework - it also contains powerful mocking tools.

Even though spock is dedicated for Groovy there is no problem with using it for Java classes tests. In this post I'm going to describe how to configure Maven project to build and run spock specifications together with traditional JUnit tests.


Firstly, we need to prepare pom.xml and add necessary dependencies and plugins.

Two obligatory libraries are:
<dependency>
<groupid>org.spockframework</groupId>
<artifactid>spock-core</artifactId>
<version>0.7-groovy-2.0</version>
<scope>test</scope>
</dependency>
<dependency>
<groupid>org.codehaus.groovy</groupId>
<artifactid>groovy-all</artifactId>
<version>${groovy.version}</version>
<scope>test</scope>
</dependency>
Where groovy.version is property defined in pom.xml for more convenient use and easy version change, just like this:
<properties>
<gmaven-plugin.version>1.4</gmaven-plugin.version>
<groovy.version>2.1.5</groovy.version>
</properties>

I've added property for gmaven-plugin version for the same reason ;)

Besides these two dependencies, we can use few additional ones providing extra functionality:
  • cglib - for class mocking
  • objenesis - enables mocking classes without default constructor
To add them to the project put these lines in <dependencies> section of pom.xml:
<dependency>
<groupid>cglib</groupId>
<artifactid>cglib-nodep</artifactId>
<version>3.0</version>
<scope>test</scope>
</dependency>
<dependency>
<groupid>org.objenesis</groupId>
<artifactid>objenesis</artifactId>
<version>1.3</version>
<scope>test</scope>
</dependency>

And that's all for dependencies section. Now we will focus on plugins necessary to compile Groovy classes. We need to add gmaven-plugin with gmaven-runtime-2.0 dependency in plugins section:
<plugin>
<groupid>org.codehaus.gmaven</groupId>
<artifactid>gmaven-plugin</artifactId>
<version>${gmaven-plugin.version}</version>
<configuration>
<providerselection>2.0</providerSelection>
</configuration>
<executions>
<execution>
<goals>
<goal>compile</goal>
<goal>testCompile</goal>
</goals>
</execution>
</executions>
<dependencies>
<dependency>
<groupid>org.codehaus.gmaven.runtime</groupId>
<artifactid>gmaven-runtime-2.0</artifactId>
<version>${gmaven-plugin.version}</version>
<exclusions>
<exclusion>
<groupid>org.codehaus.groovy</groupId>
<artifactid>groovy-all</artifactId>
</exclusion>
</exclusions>
</dependency>
<dependency>
<groupid>org.codehaus.groovy</groupId>
<artifactid>groovy-all</artifactId>
<version>${groovy.version}</version>
</dependency>
</dependencies>
</plugin>

With these configuration we can use spock and write our first specifications. But there is one issue: default settings for maven-surefire plugin demand that test classes must end with "..Test" postfix, which is ok when we want to use such naming scheme for our spock tests. But if we want to name them like CommentSpec.groovy or whatever with "..Spec" ending (what in my opinion is much more readable) we need to make little change in surefire plugin configuration:
<plugin>
<groupid>org.apache.maven.plugins</groupId>
<artifactid>maven-surefire-plugin</artifactId>
<version>2.15</version>
<configuration>
<includes>
<include>**/*Test.java</include>
<include>**/*Spec.java</include>
</includes>
</configuration>
</plugin>

As you can see there is a little trick ;) We add include directive for standard Java JUnit test ending with "..Test" postfix, but there is also an entry for spock test ending with "..Spec". And there is a trick: we must write "**/*Spec.java", not "**/*Spec.groovy", otherwise Maven will not run spock tests (which is strange and I've spent some time to figure out why Maven can't run my specs).

Little update: instead of "*.java" postfix for both types of tests we can write "*.class" what is in my opinion more readable and clean:
<include>**/*Test.class</include>
<include>**/*Spec.class</include>
(thanks to Tomek Pęksa for pointing this out!)

With such configuration, we can write either traditional JUnit test and put them in src/test/java directory or groovy spock specifications and place them in src/test/groovy. And both will work together just fine :) In one of my next posts I'll write something about using spock and its mocking abilities in practice, so stay in tune.